Before Color!
After!
Close up of valence fabric.
This is the Drapery fabric close up.
Sewing a shower drapery and valence can be done simply at home for a fraction of the costs and a high quality washable long lasting product.
The DraperyYou too, can do it!
Measure your length (height)
To a sure up have the nap (direction) of the fabric going the same way...

lay them out after you hem the edges Hem the sides by folding over 5/8th inch and then again and hem using a long stitch or basting stitch this does not need the strength.

Look for the color code and the print on the salvage edges.
These are good codes to keep for decor later when you might purchase accent items.

Just make sure they are in the same direction.

Measure your height. Measure your width (side to side) Twice the width makes for a rich fullness. Hem the sides by folding over 5/8th inch and then again and hem using a long stitch or basting stitch this does not need the strength.
However when you stitch the casing for the rod reduce the stitch width and always remember to back tack. This will be out of eye view so no need to knot by hand.

They will hang nicely open or easily pull closed.

I did not hem mine yet for I am still considering the length.
The valence.This takes consideration.
Again double the width makes a much fuller richer look(at the very least 1 and a half the width).

I designed a three part valence.
Get your ideas off line or out of magazines or decor books.

Starting with the center panel hem all salvage (edges that are a finished) edges, and raw(cut edges). Same way turn under 5/8ths twice.By doing this you make a very stable strong drapery.
Note: on garments all selvage edges should be trimmed.

The center or right panel has been hemmed the side panels (the left one)have not.

Pressing the edge that is cut on the angle is a must . This is called the bias. The bias is very unstable. If you want go ahead and press all edges before sewing. I have just been at this so many years I know what steps I can skip. This is different than garment sewing less precision.

Trim off the extra

I hope this shows I trimmed it in such a way as to lesson the bulk.

zoom, zoom, zoom.
I love fast cars and fast sewing machines.
Once you gain your confidence so will you.
It is about sewing with your whole body. It may sound strange.
See how I make use of the open drawer and the ironing board. The more stress removed from the needle the better to ZOOM ZOOM.

Once at the end I then stop needle in down position, turn and ...

Finish it off. Back tack. This is all basting for it does not need to be a strong stitch.

Working ergonomically , when you sew with your whole self conserves your energy.
Saves your back as well. When you have less need to stand or get up to move around you can use your time more efficently.

My foot is out a ways because of the knee issues I have I have learned that sewing with a straighter leg is much better on my joint.

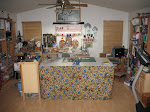
Behind me is the cutting table and the supplies. The rotatory cutters are in the drawer there as are the measuring tools and the tapes.
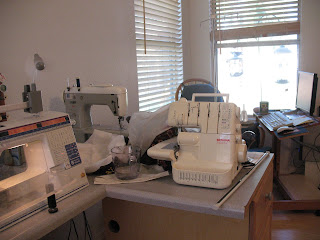
To my Right the serger and the old Phaff if I need to use it.
That drawer holds the serger threds and supplies.
There also as you see is my computer and rocker.
Looking out the window are the feeders. For wild birds bring me great joy!
I do need to fill the feeders.

If you click on the image you may be able to see the chicken tracter (coop).
Back to the Valence.
Here is the center panel. I had to piece this of two sections. I used a seam called a french fell or flat fell. Look at a pair of jeans it is the seam on the outside of the leg. All raw edges muct be secured to make this a high quality item. It will be able to be washed time after time and still hold it's integrety . No fraying or shedding as in store bought items. This just takes a little time and know how.

It is hard to see. But the raw edge is encased in a secondary seam.

Now notice my seam is not JUST Perfect...Get the point ? It does not need to be perfect . Just do your best. If this were a garmet I might unpick it and fix it. This is going to be 6 foot up in the air where nobody will be looking to see if it is just perfect. My time is valuable to I accept flaws and imperfections as part of a balenced life. :)

What matters is that all lower edges match.

Flip it all over. See the center panel, I am adjusting the turned over upper edge. I want it all to be uniform.

I used the old store bought valence for my example. I purchaced it 9 years ago and will soon pass it on or recyle the fabric. It has a nice batenburg effect I might incorperate into a garmet.

My upper casing is three inches. With all three sections being uniform at this point all you have to do is be consistent. That tool is a seam gauge. Dash thought it a cool thing to mess with. Note it is now a bit bent. I have three of thes floating aroung because they are a great sewing tool.

Sew all the casings.

Note the matching edges.

Sew it at the edge. NOW is the time for a finer stitch count. This is now important because this is where the waer will occure on your drap and valence. Here back tacking is important as well.

Using your foot plate as a guied sew your secont seam. You see the tight seam at edge (at the left) then your basting center (this is from when you hemmed it earlier. Now do your secont tight seam...back tack and sew use your plate guied.

This trimming I have has so many years.
I remember 18 years ago in our basement we had no furniture and I made pillows with this trim and we all sat arround when we had Bible study group at our house. I had this trim many a year.
Time to use it.

Now note that I am only dangling the tassels and the trim is sewn up onto the fabric.
This is an unfinished undersided trim.
I clip the tassels just by the secureing thred so it does not unravel.

When I turn this the underside is secured but the tassels are not doubbled.

Finished edges give a look of qualith. This trim sewn on with a wide basting stitch.

Keeping the needle down turn. Lower the presser foot and
Travel all the way down ..back tack, clip all threads.

On the back side it will have the finished fabric behind the trim to hide it.

Now run another seam (wide stitch) and you will have a strong trim that will last washing after washing.

The hemmed edge will be what you see if you look up at it when it is hanging.

On the back side there will be two stitch lines for the trim(the white tread) and one for the fabric hem (the blue). Secure, stable and strong. Made with quality.

After all those years of holding onto this trim this is what I had left over. Just enough to trim a hand towel. Provision.
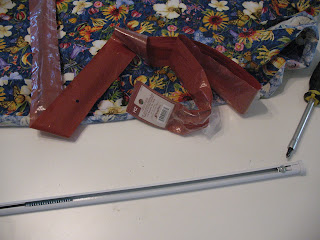
I used two simple spring tension rods. One for the drapery and one for the valence. The shower curtin that hold the water back is on a very strong shower rod. Unscrew the screw and the rod is easily sized.

Remove the rubber stopper thred the sections through.

Replace the rubber stopper and hang up your work.
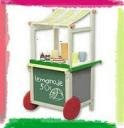
Walla!See the cute wall paper boarder I found for $1.60 a 5 yard roll. Provision. The fabric was purchased last year for 90% off and the whole thing was around $15. or so.Now you too can do this to your liking .Or like me use what is provided and rejoice in the provision. I loved this fabric when I saw it. Now to see what I found to use it for...well I really like the flowers, colors and the sweet little insects that are pollenating all those flowers. Life. The fabric represents life. I will also hang this sign.I still need to make the window treatment,andhang the wallpaper boarder.
 She wrote...
 I would like to share this award with all of you, my dear blogging friends and visitors. Feel free to pass these on to your precious friends.